What Is RapidRise Yeast?

Last week at the Folk School, a student asked about RapidRise yeast—what is it? This is one of those questions I’ve always meant to look up again, having not previously found a good answer. I knew that RapidRise is a brand name, but what type of yeast is it actually?

Yeast Review

a jar of active dry yeast with a small pile of yeast granules

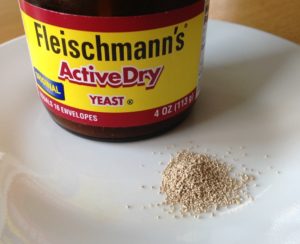
Good old active dry yeast

You may remember that active dry yeast is a dried-out form of yeast that is supposed to be activated (brought out of dormancy) with warm water before use. Instant yeast is also dried out, but there is no need to activate it, hence the name. With SAF instant yeast, it is the rapid drying process that enables it to be used instantly and produces its tubular shape. I learned this in a talk by someone from LaSaffre and wrote about it here: https://foodchemblog.com/2014/08/notes-from-the-science-of-yeast-talk/

Answer 1: RapidRise Is Instant Yeast, Almost

I found two articles by P.J. Hamel on the King Arthur website that seemed to mostly answer the question:

Which Yeast To Use: Choosing The Best Type For Any Recipe, 2016, https://blog.kingarthurflour.com/2016/01/29/yeast-use/

Baguettes – Take A Walk On The Wild (Yeast) Side, 2010, https://blog.kingarthurflour.com/2010/10/11/baguettes-take-a-walk-on-the-wild-yeast-side/

A packet of RapidRise yeast and a pile of granules

RapidRise yeast

The first article (the 2016 one) confirms that RapidRise is Fleischmann’s brand name, while Quick-Rise is Red Star’s; these fast-rising yeasts claim to work faster than active dry yeast. They include the words “instant yeast” on their packaging. The article also mentions LeSaffre’s SAF instant yeast, the favorite at King Arthur.

The article states that “SAF instant yeast is not the same as Red Star and Fleischmann’s fast-rising yeasts.” One difference is noted: Red Star Quick-Rise yeast is not supposed to be used for refrigerated or frozen doughs, while SAF instant yeast can be. Otherwise, it’s not clear what the difference is or what causes it.

Then a test is done comparing an active dry yeast, Quick-Rise yeast, and SAF instant yeast. The active dry yeast lags behind the others (but note * below; perhaps she had not activated the active dry yeast, and it hurt performance?), while the others perform about the same. Subtle differences are noted, but they seem negligible.

The second (2010) article digs deeper into the technical differences between the yeasts.

Note the round shape of active dry yeast granules

Regarding active dry yeast, the article gives a reason for activation that I have never before heard: it’s not about bringing yeast cells out of dormancy, but rather about washing away dead yeast cells to expose the live ones. It states that this activation is no longer necessary,* due to improvements in active dry yeast, which no longer has so many dead cells. (I wish I had more information about this, as it doesn’t seem to match what I heard from the yeast expert from LeSaffre.)

Regarding instant yeast, RapidRise yeast, and bread machine yeast, the article states that instant and bread machines yeasts are the same thing, but that “there’s no agreement, even among folks from the same company, as to whether RapidRise and instant yeast are the exact same yeast.”

Answer 2: There Are Genetic Differences

granules of RapidRise yeast

Note the tubular shape of RapidRise granules

I went to class all ready to discuss what I’d learned, but it turned out the student had done his own research and come up with completely difference answers.

The Bakerpedia website (which uses “quick rise dry yeast,” a.k.a. instant yeast, for the general name) says that instant yeast is a genetically engineered yeast strain that stays active after drying. There is also a special drying process that creates porous particles, while protecting yeast cells from damage. The porosity enables the particles to rehydrate rapidly but also hurts their shelf life. The yeast is also “finely ground.” References are given! But I have not had time to follow up with them. Read more here: http://bakerpedia.com/ingredients/quick-rise-dry-yeast/

This entry notes that the baker can skip some steps when using instant yeast, but remember that we like more steps because more time rising equals more flavor.

My Conclusions

It can be hard to figure out whom to trust on the Internet. My takeaway from all this is that RapidRise yeast acts basically the same as instant yeast (based on the experiment shown in the 2016 article), with the exception of cold doughs. There seems to be something going on behind the scenes (secret strains of yeast? patented drying processes?) that prevents us from learning what the specific differences are among the yeast brands.

packets of Pizza Crust Yeast

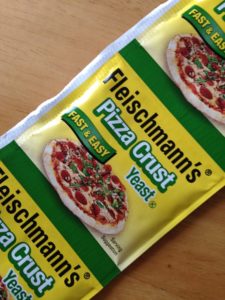
Wait, pizza crust yeast? What the heck is that?!

Classification seems to depend on how instant yeast as a category is defined. If it simply means “yeast that starts right up without activation,” then it seems clear that RapidRise, Quick-Rise, and SAF are all instant yeasts.

If SAF somehow defines instant yeast, as the King Arthur site seems to imply, then we don’t know whether RapidRise and Quick-Rise are the same: whether they contain the same type of yeast as SAF or use the same drying process. (RapidRise yeast does have the same tubular shape as SAF.) If not, they might not be the same as SAF instant, but they’d still be in a category together; maybe we’d call it “fast-rising yeasts,” since “instant” seems to cause confusion.

Regardless, for bread making purposes, it seems that you can use any instant yeast in recipes that call for a particular brand (such as RapidRise) or in a bread machine. And, you can substitute instant yeast for active dry yeast, or vice versa, knowing that your dough might (or might not) rise a little more slowly with active dry.

If you’ve had any experiences with a certain type or brand of yeast, please share it in the comments!

Do Sourdough

book coverI just read a small book called Do Sourdough: Slow Bread for Busy Lives, by Andrew Whitley. [1] The book contains everything a beginner needs to know to work with sourdough, from creating a starter to using it in bread (recipes included), without any additional clutter. Mr. Whitley, a baker after my own heart, points the reader toward the cheapest solutions and the easiest methods. I have friends interested in sourdough, as a possible solution to gluten intolerance, and this is the book I will point them to.

Even for long-time bakers, the book contains many gold nuggets. For example, Mr. Whitley keeps his starter in the fridge for months, never wasting flour on feedings, and never throwing any away. I’m a little bit scared to try this but it sure would save flour. I also learned that less starter makes a stronger flavor, because it slows the rising time (controlled by yeasts) and enables the bacteria to make more flavor molecules. (See my last blog post about this.)

I also learned about these items:

  • When you scale up recipes with baker’s yeast, you usually decrease the yeast because the large mass of dough holds heat, which speeds up the reactions; no adjustment is needed with sourdough, because its microorganisms perform more slowly.
  • That bubble that forms under the crust during baking? Mr. Whitley has a whole list of possible causes!
  • Want a softer crust? Try dusting your shaped dough with flour, which interferes with crust formation. Or, wrap the finished loaf in a towel to trap moisture, or brush the loaf with olive oil.
  • Why should you use organic flour? I always did it for the environment, but Mr. Whitley points out that non-organic flour contains residues of pesticides, herbicides, and fungicides (no!) designed to kill, and will affect the health of your yeasts and bacteria.

Do Sourdough was a delightful quick read, and I’m excited to have it on my shelf. It’s website is http://thedobook.co/products/do-sourdough-slow-bread-for-busy-lives.

[1] Whitley, Andrew. Do Sourdough: Slow Bread for Busy Lives (United Kingdom: The Do Book Co., 2014).

Roles of Yeast and Bacteria

I’ve been reading a really nice little book called Do Sourdough by Andrew Whitley—I’ll post more on that shortly. The book revived a question I’ve long had.

In making yeasted bread with commercial baker’s yeast, the yeast performs (aerobic) respiration and (anaerobic) fermentation. The results are the carbon dioxide and water that make the bread rise and the organic molecules that provide flavor. Respiration turns glucose into CO2 and water (plus energy is released), whereas fermentation results in a little CO2 and ethanol.

starter
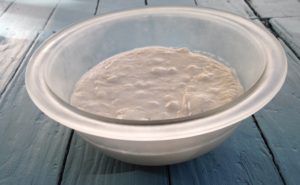
I’ve read that, in sourdough starters, the wild yeasts are responsible for raising the dough, while the bacteria create the flavor. This never made sense to me: Don’t both kinds of microorganism perform fermentation and respiration? What’s the difference? This time, I started poking around looking for answers.

My first thought was a dead end. I recalled that the wild yeasts and bacteria are symbiotic because they process different sugar molecules; maybe this resulted in the different outputs, I thought. But when I found the paper [1], it was the bacteria that were fermenting maltose (via glucose), the familiar reaction I described above. The yeast ferment the small percent of other sugars. I also wondered about different microorganisms producing different organic molecules, but this doesn’t change the production of CO2.

Finally I thought about the two processes at work. Maybe the situation is this [speculation alert!]: The yeast perform respiration, making the dough rise. (Eventually they might switch to fermentation when oxygen runs low, but maybe this is considered negligible in sourdough, or maybe the roles listed for each microorganism are not strict.) The bacteria DON’T perform respiration; they only perform fermentation, producing less CO2 (again, an amount that can be overlooked) and most of the flavor molecules.

Hunting online seemed to confirm this: Eukaryotes (like yeast) perform aerobic cellular respiration until the oxygen runs out. Some prokaryotic bacteria perform cellular respiration (aerobic OR anaerobic!), but some only perform fermentation. Lactic acid bacteria (LAB)? “They generally are non respiratory and lack catalase. They ferment glucose primarily to lactic acid, or to lactic acid, CO2 and ethanol. All LAB grow anaerobically, but unlike most anaerobes, they grow in the presence of O2 as ‘aerotolerant anaerobes.’” [2]

I’d like to have an “official” reference for this information, but yeast-related info (in my experience) is difficult to pinpoint. It’s too low level for a journal article, but microbiology textbooks are vague, plus there are so many different yeasts and bacteria out there. What I need is a paper on sourdough bacteria and how they function. Anyone seen one?

A neat consequence of this splitting of roles is pointed out in Mr. Whitley’s book: if you want to add more tang to your sourdough, decrease the amount of starter. Reducing the yeast population slows the dough’s rising, giving the lactic acid bacteria more time to work. For a milder dough, use more starter.

Note from author: This is the first blog post I’ve done in awhile. I’ve been spending my time finishing up my next book (a memoir) and building a freelance copyediting business, so I haven’t had the time to research the ideas I get for the blog. (This one isn’t really researched, as noted above!) I wanted to explain my long absence, which might continue for awhile.

[1] Sugihara, T.F., L. Kline, and M. W. Miller. “Microorganisms of the San Francisco sour dough bread process, I. and II.” Applied Microbiology 21 (1971) 456–458, 459–465.

[2] Todar, K. “Lactic Acid Bacteria.” Todar’s Online Textbook of Bacteriology. http://textbookofbacteriology.net/lactics.html [Accessed June 17, 2016].

Paper or Plastic?

This post was in anticipation of the January 28, 2015 (postponed from January 21) #breadchat on Twitter on the topic of storing bread. (Learn more about #breadchat: http://www.breadstorm.com/breadchat.html). The info has been taken from my book, Bread Science, which, incidentally, is now available as an ebook! (https://www.twobluebooks.com/ebooks/) There may be more recent research papers about staling; if you know of any, please share them.

The non-artisan bread prefers plastic.

The non-artisan bread prefers plastic.

Understanding staling is a good way to begin a discussion of bread storage. We think of stale bread as being dry, rock hard or too tough to chew, and/or flavorless. Scientists have described many aspects of staling; they occur at different rates so that bread might be stale in some ways but not others. The research is interesting to consider, but keep in mind that the research was often done with a goal of increasing the shelf-life of factory-made bread. For example, one study stored the bread in tin containers in a special cabinet [1], which might not be relevant to artisan bread stored on your counter.

Staling includes the following: [2,3,4]

  1. The crust becomes tough/chewy instead of crusty because moisture migrates from the middle of the bread outward to the atmosphere, via the crust.
  2. The bread becomes dry because of moisture migration.
  3. The crumb or inside of the bread becomes firm. This happens even when the bread is packaged so that moisture is retained; it is not simply the bread drying out. Firming is sometimes blamed on changes in the starch (see number 5), but this connection has been disputed; the cause of firming remains unknown.
  4. The bread loses flavor. This is because organic flavor molecules are lost to the atmosphere, deactivated, or altered in ways that affect flavor. The reappearance of some flavors on heating suggests that flavor compounds might become trapped in starch and released with heating. [5]
  5. The crumb becomes more white/opaque and firm due to starch retrogradation.
baguettes in paper bags

Crusty baguettes are usually found in paper bags.

What is retrogradation? During baking, the starch in dough melts. The molecules become less organized and allow water molecules to move near them; some are partially dissolved. As the bread cools, the starch recrystallizes (retrogrades), going back to a solid form. This causes firmness. One part of the starch, amylose, retrogrades quickly, resulting in the original firmness of the bread. The other part, amylopectin, retrogrades more slowly, resulting in added firmness over the next few days. Some scientists link this with staling firmness and some do not. (Note: I find the concept of melting/solidifying starch a little confusing. Starch is [also?] absorbing water and gelating during baking. I don’t understand how these two concepts merge/overlap.)

How best to store your bread depends on how and when you plan to eat it. For example, a French baguette intended for that night’s family dinner would be best in a paper bag, which will maintain its crispy crust; but the same baguette will be rock hard in a day or two, so a plastic bag will keep it edible for a few days.

Temperature also affects staling: starch retrogradation happens faster at lower temperatures (i.e., in a refrigerator) but stops below freezing. Some aspects of staling can be reversed by heating: the starch crystals melt around 60°C (140°F), and the bread continues to soften up to about 100°C (~200°F), as shown in this plot: [1]

staling plot

Here are some storage methods to consider:

  • Paper bag. Bread will stay crusty but become firm and dry. There is no cure for dry bread. Use paper if crust is very important to you and you can eat the bread quickly.
  • Plastic bag or container. Bread will retain its moisture but become chewy/tough and lose its crustiness. It can be softened and “re-crusted” in the oven (see below).
  • Freezer. Bread can be stored a long time, and the re-crusting method (below) works to heat it for a dinner party. This bread also works as toast if you pre-slice it.
  • Fridge. Bad!!!
sandwich loaves in plastic bags

Sliced sandwich loaves often come in plastic bags.

To recreate (sort of) fresh-baked bread, keep your loaf (or some chunk of it) whole. Double-bag it and put it in the freezer. When you want to eat it, pull it out and defrost it completely; this may take a few hours depending on the room temperature. Heat the oven to 300°F. Put the naked loaf in (right on the oven rack) for ten minutes for a large loaf, less for smaller loaves. If the bread has been cut, cover the open side with foil to prevent the crumb from drying out. When you take the bread out, it will be crusty on the outside and soft in the middle, just like new. [6] Note that you can’t perform this magic repeated times, because the bread does get drier; it’s best to do this RIGHT before serving the bread.

I personally cannot eat a whole loaf before it stales, and I prefer to maintain the moisture of the bread rather than the crust. Therefore, my technique is this:

  • Cut off what I think I can eat in 2-3 days.
  • Put it in a plastic bag or Tupperware container.
  • Slice the rest, put it in a plastic bag, and freeze it.
  • Pull out frozen slices for toast as needed. A light toasting can defrost the bread without making it too crispy. Sometimes I let it defrost with time and then barely warm it in the toaster oven to make it softer.

[1] Bechtel, W.G., D.F. Meisner, and W.B. Bradley. “The effect of the crust on the staling of bread.” Cereal Chemistry 30 (1953) 160-168.

[2] “Bread and bakery products.” Foods and Food Production Encyclopedia. New York: Van Nostrand Reinhold Co., 1982 291-292.

[3] Hoseney, R.C. Principles of Cereal Science and Technology. St. Paul, Minnesota: American Association of Cereal Chemists, 1986 234-235.

[4] Kulp, K. “Baker’s yeast and sourdough in U.S. bread products.” Handbook of Dough Fermentation. New York, Basel: Marcel Dekker, Inc., 2003 132-133.

[5] Martinez-Anaya, M.A. “Enzymes and bread flavor.” Journal of Agricultural and Food Chemistry 44 (1996) 2469-2480.

[6] Update: I decided to do a taste test. Loaves A and B were sourdough boules. Loaves C and D were French demibaguettes. A and C were baked Monday, bagged and frozen, and defrosted Sunday morning; the crust was not at all crispy. Loaves B and D were baked Sunday morning. On Sunday evening, all four loaves were re-heated using the method described. When I sliced them, they all felt about the same. People were told that the breads were the same but had been stored differently and were asked, “Is one better?”

Sourdough: A = 1 vote, B = 7 votes, same = 2 votes; comments: A had a more sour flavor and thinner, crispier crust; B was more sour; B had a crisp crust

French: C = 3 votes, D = 5 votes; comments: D had a crispier crust; D was crustier

Obviously the test isn’t perfect, since the breads came from different batches of dough. Also, it would have been smarter to cut cubes of interior without crust, to assess the interior flavor alone. But the results seem to indicate that the frozen bread is pretty good, if not as good, as the new bread.

Bread Science eBook

BreadScienceCoverFrontThis is just a short announcement. I’ve just converted my book, Bread Science, to an ebook. You can read more about it here: http://www.twobluebooks.com/eBook.php.

I’m working on a post about staling and storing bread in anticipation of the upcoming #breadchat on Twitter (January 28, 2015, 3pm EDT, postponed from January 21–see the archive here: https://storify.com/AmateurBakers/breadchat-transcript-2015-january-storing-bread), so I should have a real post soon. I’m also working on one about tangzhong roux, which was the topic of October’s #breadchat.

Finally, I’m planning to type up my notes from converting the book, so I’ll post those when they’re ready.

Hope everyone’s having a happy December!

Cheese Notes

book coverAt the beginning of summer, I reviewed a book called The Science of Cheese for American Scientist Magazine. Last week, with summer winding down, the review was published [1] in the midst of a spate of cheese-related activity in my life: I received an invitation to the christening of a local cheese cave [2], I registered for a raw milk cheese tasting class, and my all-time favorite cheese, aged gouda, went on sale.

Reading The Science of Cheese made me consider the range of products that pass for cheese. To some, cheese means a fat quesadilla oozing with melted cheddar jack. To my aunt, cheese is a mail-order box lined with freezer packs from Murray’s in New York City. My cheese history starts with slices of American (which I still love) and progresses to my beloved aged gouda.

cheese-maker at work

Mary Turner, former cheese-maker at Celebrity Dairy in Siler City, NC, pours pasteurized goat milk into the cheese-making vat.

North Carolina has a growing number of cheese-makers. I’ve visited dairy farms and cheese houses, so I know for sure that some cheese is made in small batches and monitored daily by actual people. But there are missing connections. If a cheese comes all the way from France, and it’s sold regularly in the fancy cheese case at my market, surely it’s being produced in bigger batches and sold elsewhere, right? Can good cheese be made in bigger batches? Where are the lines drawn?

So when I picked up The Science of Cheese, I hoped to read about the quaint cheese-making ventures that somehow keep us all well-stocked. I also hoped to learn about massive cheese-making facilities and how they make the dull bricks that pass as cheese in mainstream supermarkets. The book fell open to the back flap; the author looked a lot like my p-chem professor, and his bio described him as “creating new dairy products” and “expanding marketability.”

cheese costume

I actually dressed as cheese one Halloween. The costume had formerly been a book for a Harry Potter release party.

I recoiled in horror; this didn’t sound like my kind of cheese! Then followed an anguished evening of wondering how to reconcile my art half and my science half with thoughts like, “Science is the truth! But I’m swayed by the appealing nature of the phony pastoral setting! I’m a terrible scientist!” and even “Maybe cheese is a metaphor for me: part art and part science….” But anyway, I eventually started reading.

Although The Science of Cheese was informative and entertaining, it didn’t provide the answers I craved. As described in my review, I found a brief description of how tasteless, made-in-America cheese has had its fat and protein replaced with water and its aging time reduced (to save money). But I still lacked a big picture understanding.

Then I went to cheese class.

cheese class

Tyler’s photo of our cheeses at the start of class.

The class was led by Ashley Morton and Tyler Morgan, who recently flew to California to take the American Cheese Society’s Certified Cheese Professional Exam. [3] They had prepared plates for each student with eight wedges of cheese on each, and they described each as we ate it. Here are some of the things I learned:

        • The sources of the microflora that affect raw milk cheese are the milk itself, the added starter culture, and the environment. When milk is pasteurized (heated), the milk microflora are lost.
        • When milk is pasteurized, the proteins denature, which results in a more pliant cheese that is harder to crumble or break. (Tyler used the word plasticky, for lack of a better word, but plastic has a science-y meaning of “the opposite of elastic.”)
        • The properties of a raw milk cheese vary more than those of cheeses made with pasteurized milk. An artisan cheese-maker enjoys this inconsistency and monitors the cheeses daily, but in a larger production facility, consistency is important.
        • The Kinsman Ridge cheese that we tasted had a white color because it was made with milk from April, when the cows (in Jasper Hill, VT) had not been on pasture all winter. The milk from the summertime produces a yellower cheese. This is true of cow’s milk but not of sheep or goat milk because those animals can process the beta carotene that causes the color.
        • The rind that forms on raw milk cheese varies depending on where the cheese is aged because of different microflora in the air. This is an example of terroir, the characteristics brought to cheese by its environment. In The Science of Cheese, the author describes terroir as a disputed concept that some scientists say has only negligible effects; I wondered how they might explain the different rinds.
aged gouda

My beloved aged gouda.

      • There was a question about the crystals sometimes found in cheese. According to the Internet, these crystals can be calcium lactate that crystallizes out of solution as the cheese dries out. They can also be amino acid crystals that form as the casein proteins unravel during aging. (Incidentally, I also discovered that these crystals stimulate stuff that leads to happiness. [4] No wonder I like that aged gouda so much!)
      • Herve Mons is a famous affineur in France who ages 200 types of cheese in cheese caves built inside an abandoned train tunnel. (You can see a slideshow of the tunnel here, and it’s not nearly as dank and creepy as you’d expect. [5]) Some farmers age their own cheeses, but some make the cheese and sell it to an affineur. The farmer makes less money but doesn’t have to spend time on the aging process or take the inherent risks.
      • The blue in blue cheese forms when the cheese is pierced to let in oxygen, which enables the blue mold to grow. The sizes and locations of the blue spots can therefore be controlled.
      • Blue cheeses that are “naturally fused” end up very crumbly, whereas blue cheeses that are pressed end up with more of a creamy texture.

Tyler took a moment to share his thoughts on the FDA’s aggressive stance towards raw milk cheeses. In June, an FDA inspector cited some cheese-makers for aging on wooden boards, saying the boards could not be properly sanitized according to FDA specifications. [6] The cheese-making community responded, and the FDA quickly put out a statement that said (I’m paraphrasing) “Oh, no, no, we didn’t mean that!” [7] Now, the FDA has lowered the acceptable level of E. coli in cheese from 10,000 to 10, in spite of the fact that many strains of E. coli are nonpathogenic and are in fact a healthy part of the microflora of the gut. It seems the FDA is not using actual science to make safety rules.

At this point, I was filled with cheese and beer and was dying to say something about the Cheese Nun, but I couldn’t remember her story well enough. What I remembered was that when traditional cheese-making at a cloister in Connecticut came under fire by government regulators, one of the sisters went to university to receive a doctorate in microbiology so that she could properly defend cheese-making at the cloister. Upon googling, I now remember that she did an experiment for inspectors in which she added E. coli to batches of cheese in wooden and stainless steel vats. (The inspectors had been upset by the use of wood.) The wooden vat ended up with no E. coli, whereas the cheese in the sterile stainless steel vat was filled. The nun, Sister Noella Marcellino, was the subject of a PBS documentary and was included in Michael Pollan’s book Cooked.

Cheese class was wrapping up, and I felt clearer on the whole state of cheese. It’s not an A or B situation but a wide range of possibilities, from farmers who make their own to cheese-makers who buy local milk, to affineurs who age the cheese of others, to larger batches of cheese that are kept consistent, all the way down to Easy Cheese and Cheez Whiz. Tyler not only sent me a photo from class but graciously gave me another book to read: Cheese and Culture by Paul S. Kindstedt, which is sure to lend more insight.

hillsborough cheese

Three stages of a batch of cheese at Hillsborough Cheese Company, Hillsborough, NC.


[1] Buehler, Emily. ”The Cheese Plate Stands Alone,” American Scientist, Sept-Oct 2014. https://www.americanscientist.org/bookshelf/pub/the-cheese-plate-stands-alone

[2] A slideshow of the construction of the cheese cave at Piemonte Farm in Burlington, NC. http://www.piemontecheese.com/cheese-cave.html

[3] About the ACS CCP exam. http://www.cheesesociety.org/events-education/certification-2/

[4] “Why Aged Cheeses Are Crunchy—And Why They Make You Happy.” Savenor’s. March 11, 2013. http://www.savenorsmarket.com/web/news/why-aged-cheeses-are-crunchy-and-why-they-make-you-happy/

[5] Slideshow of Herve Mons’s train tunnel. http://www.mons-fromages.com/sites/default/files/depliant-tunnel-gb/index.html

[6] I think this is the inspector’s statement; I couldn’t find a version on the FDA website: http://www.foodsafetynews.com/files/2014/06/Use-of-wooden-shelves-for-cheese-aging.pdf. And this is the code to which she refers, Code of Federal Regulations Title 21, section 110.40(a): http://www.accessdata.fda.gov/scripts/cdrh/cfdocs/cfcfr/cfrsearch.cfm?fr=110.40

[7] “Clarification on Using Wood Shelving in Artisanal Cheesemaking.” CFSAN Constituent Update. June 11, 2014. http://www.fda.gov/Food/NewsEvents/ConstituentUpdates/ucm400808.htm

Notes from “The Science of Yeast” Talk

Last April at the Asheville Bread Festival, I heard Dominique Homo from LaSaffre talk on “The Science of Yeast.” I’ve meant to type up my notes ever since, so here they are.

yeast under microscope

Baker’s yeast under a microscope (100× objective, 15× eyepiece; numbered ticks are 11 µm apart). By Bob Blaylock, via Wikimedia Commons.

First off, I was embarrassingly late to the talk because of my own class. I arrived during a description of the yeast budding process, which occurs every 20 minutes under controlled conditions including a temperature of 28° (I assume °C) and regulated pH and air flow. Note that this temperature works well for growing yeast but is too high for dough.

Others points of interest on growing yeast:

  • Traditionally, molasses was used as the platform on which yeast was grown. But the sugar industry has become more developed in America; there is now only about 45% of sugar left in molasses, as opposed to 60% in Cuba. (I don’t know if he meant that 45% of the total sugar remains or that 45% of the molasses is sugar.) Therefore, corn syrup is now used.
  • The yeast-growing process starts with yeast from a yeast bank that is sent frozen by mail. It is grown on pure glucose for three days in a sterile environment. Then it goes into a tank. What starts as less than a gram of yeast becomes about 250 tons in 10 days.
  • Dominique said something interesting about periodically “removing the new yeast” to “control mutations,” but I didn’t catch it. I think he meant that they want as much of the yeast as possible to come from reproduction of the original, pure yeast cells. If a mutation does occur, it will propagate (kind of like when you play Telephone), so removing newer yeast cells reduces the chances of that occurring. This also means a reduction in yeast production, but maybe 250 tons is plenty.

Next, Dominique spoke about the types of yeast. There were a few kinds I had never heard of. Here’s a table:

A table from Dominique's talk


    • Cream yeast. This is 80% water and 20% yeast. It is used by large bakeries (25,000 lbs/week!) and is delivered to the bakeries in tanker trucks. Yikes.
fresh yeast

Fresh yeast. By Hellahulla, via Wikimedia Commons.

    • Crumbled yeast. This is fresh yeast that is crumbled and packaged in 50 lb bags for medium-sized bakeries.
    • Compressed yeast. A.k.a. fresh yeast, this comes in one pound blocks and is used by medium- and small-sized bakeries. It is often two to three weeks old by the time it arrives, so you should only use it if you can use it up quickly.
    • Active dry yeast. This is a dried-out version of yeast that has a much longer shelf-life. Supposedly, it must be activated before use (more on this below). It is used by small bakeries, artisan bakeries, and home bakers. Some of the yeast cells are dead. This can affect dough in ways that some prefer and some don’t; more on this below.
dry yeast

Dry yeast. By Vanderdecken, via Wikimedia Commons.

  • Instant yeast. This is also a dried yeast used by small bakeries, artisan bakeries, and home bakers, but it does not need to be activated before adding to dough. Instant yeast is actually drier than active dry yeast! A different drying process is used that enables it to dry very quickly so that yeast cells are not killed: The yeast is made into very thin noodles with a yeast version of a spaghetti machine. The noodles exit the machine into blowing hot air, which dries them and causes them to break. (If you look closely at the yeast, it has a tubular shape.) The yeast is then vacuum-packed.
  • Deactivated yeast. This is dead yeast. Huh? Why would anyone add that to bread dough? The answer deserves a new paragraph.

Deactivated yeast is made by heating cream yeast on a hot plate until it is dead. It contributes no fermentation to the dough but “enhances the yeasty flavor profile.” It also provides “better machinability” by releasing a molecule (glutathione) that reacts with the protein in the dough. (It is a reducing reaction.) The reaction makes the dough less elastic and more extensible, which means you can mix it less. This yeast is often used in doughs that need to be stretched such as in pizza, croissants (which are folded repeatedly as layers of butter are added—the dead yeast reduces the time needed for the dough to relax between folds), and puff pastry as well as for crackers (it enhances the cheesy flavor). It is also used when consistency is needed in a large number of loaves, for example, 5000 baguettes are being made per hour and each one needs to be 5 inches long, not 4.9. Similar effects are obtained with L-cysteine, but deactivated yeast looks “cleaner” in an ingredient list because it can be called “yeast.”

Some people like active dry yeast because it contains some dead yeast; it can produce a reduced version (ha ha, bad chemistry pun) of the effects of deactivated yeast.

Now we come to activating. Ah, activating! I had just told my class all about why to skip activating, so I cowered lower in my seat as Dominique espoused its necessity. Dominique said that it takes yeast a long time to get going in flour; it needs to rehydrate and dissolve. If the water needed by the recipe is too cold for the yeast, the yeast won’t work, and some of it will die, resulting in a slow fermentation. The yeast needs to be rehydrated with 100 to 110° water (I assume °F).

The reason I don’t like activating, aside from it being a slight pain, is that you need to use some water, which you must subtract from your recipe. With students who aren’t experienced with recipes, this can cause confusion; and if the recipe is not adjusted, the hydration becomes off and the dough is too wet. I always tell students to mix the yeast into their flour, which will protect it if cold water is used. (Incidentally, the way I came to this practice was that I was doing it with “instant yeast” that turned out to be mislabeled active dry yeast, and I never had a problem.)

But I wouldn’t presume to contradict the yeast expert. Now it occurred to me, however, that I always use an autolease when I make bread and teach classes. Maybe this rest period gives the yeast a chance to activate before kneading begins, and this is why I’ve never had a problem.

Dominique compared LeSaffre’s gold and red yeasts. (The names refer to the package colors.) The gold is osmotolerant yeast, which is designed to work with doughs that use more than 5% sugar. Why this works deserves its own blog post, so I’ll get right on that. (Update: Read it here.) Dominique also mentioned that the gold yeast works better with low hydration doughs and produces a more evenly browned crust, whereas the red yeast results in more burn spots on bread. I’m not sure why this happens, but I will post about it if I ever learn more.

Dominique concluded by remarking that people often blame the yeast for problems with their bread-making even while using improper procedures and taking short-cuts. The yeast is rarely at fault! For example, he consulted with a bakery at a grocery store that was not getting good rise and discovered that they were baking everything (not just pastries but breads) at a low temperature of 350° to make it easy on their staff.

Other notes I scribbled down, with no further explanation:

  • You can spike sourdough with up to 0.1% yeast and it won’t affect the flavor.
  • Hard water affects yeast.
  • Chlorine in water slows yeast.
  • Do not use distilled water to make bread.
  • Citric acid is really bad.
yeast sketch

A 1680 sketch of yeast by Anton van Leeuwenhoek, via Wikimedia Commons.

Read to the Tune of “The Boxer”*

Someone recently asked me to explain the chemistry of pretzel-making. To my surprise, I found nothing online until I went to Google Scholar, where I found Yao et al’s 2006 paper, “Effect of Alkali Dipping on Dough and Final Product Quality,” [1] which begins “The effects of alkali dipping on starch, protein, and color changes in hard pretzel products has never been researched.”

pretzels-folkschoolYou may know that the traditional process for making pretzels involves dipping the shaped dough into a lye bath before baking. These days, lye is sodium hydroxide, NaOH, a strong base, which must be used with caution. Some people avoid using lye by using baking soda (sodium bicarbonate, NaHCO3), which is a weak base. Harold McGee published an article on making “baked baking soda” (sodium carbonate, Na2CO3) as a slightly stronger version of baking soda. [2] There is also varying thought on dipping pretzels into hot versus cold baths.

Yao et al looked at pretzel dough dipped into water and lye solution at cold and hot temperatures. Here’s what they found out:

  1. Neither dip resulted in a loss of protein into the dipping solution.
  2. The dip resulted in the hydrolysis of protein into smaller peptides. This happened a little bit in 25°C water or lye dip, more in 80°C water, and a lot more in 80°C lye dip. Also, the smaller peptides in the hot lye dip had the smallest molecular weights; most of them “walked off” the electrophoresis gel, leaving no bands. The authors explain that the alkaline conditions of the lye dip result in like charges along the proteins, which repel and cause the proteins to unfold; this makes them more susceptible to hydrolysis.
  3. The starch in the dough dipped in lye solution had a higher hydration capacity. The researchers suggest that this corresponds to a decrease in the lipid content of the starch.
  4. The starch at the surface of the dough dipped in hot water or lye almost completely gels. The doughs dipped at room temperature showed minimal gelling, although the dough in the lye dip showed some modification of its crystalline matter. The starch inside of the dough is not affected by the dip.
  5. Starch-lipid complexes dissociate in the lye dip, even at low temperatures. It’s likely that the lipid is saponified by the lye, which results in an alcohol molecule and a sodium-fatty-acid salt.
  6. The “carbohydrate profile” of the dough surfaces and the dipping solutions showed the following: the water-dipped dough had a lot of amylopectin and a little amylose; the lye-dipped dough had similar amylopectin and less amylose. The water dip had a lot of lower-molecular-weight molecules (dextrins and saccharides). The lye dip had a little amylopectin, a good deal of amylose, and a lot of lower-molecular-weight molecules (but less than in the water dip). More on this below.
  7. Dough has been observed to change color when dipped in lye solution. This is because pigment molecules in the starch are detached and extracted. However, this study showed that after baking, the removal of the pigments had no effect on the final pretzel color.
  8. Pretzels dipped in water were harder than those dipped in lye. The authors attribute this to lye disrupting the starch structure, to the higher hydration capacity (see item 3) of lye-dipped dough, and to the hydrolysis of proteins (2) that results in lye dip.
  9. Regarding color after baking, the water dip produced a higher L value and lower a and b values than the lye dip. I had no idea what this meant, so I looked online and found this definition of L value: “L is a correlate of lightness, and is computed from the Y tristimulus value using Priest’s approximation to Munsell value… [equation].” So that didn’t help me. From what I can gather, the lye dip resulted in darker, browner pretzels, but I could totally be wrong about this.

Some thoughts that I had:

The protein results (2 in the list above) indicate that the lye dip provides the smaller proteins needed for Maillard reactions, whereas the water dip does not. This seemed like perhaps the most important point to me.

I wonder what the starch hydration capacity (3) means for the final pretzel. For one thing, is this result for the surface dough or throughout the pretzel? Does it make the pretzel more moist? Does it slow down the baking process? Does it result in more small sugars once baking begins? As for the gelling of the surface starch (4), I imagine this prevents the pretzel surface from expanding during baking, creating the desired interior texture. This means that using a hot dip would cause a different internal texture than using a cold dip.

I find the results of the carbohydrate profile (6) a bit confusing. For one thing, I wish there were a control profile of undipped dough; are the starches bundled together, and the dip releases amylopectin and amylose molecules, causing their peaks to appear? I also don’t understand how the carbs that are dissolved in the dip have any effect on the final pretzel: isn’t the dip removed, so that only the carbs on the dough surface are around when the dough goes into the oven?

The authors conclude that “large molecules such as amylose or amylopectin were more easily dissolved in alkaline solution than in water due to the disruption of hydrogen bonds.” (The lye dip had these starches in it, but the water dip did not.) The authors discuss conflicting previous research: one study showed that starch cooked with NaOH was more water soluble but also depolymerized, whereas another showed that sugars polymerize at high pH. The authors conclude,

“Thus, 2 opposite reactions might be occurring during baking of alkali cooked dough: amylose and amylopectin that are dispersed would undergo further depolymerization to produce low-molecular-weight saccharides, including reducing sugars that participate in Maillard reactions; or, monosaccharides heated under basic conditions lead to degradation reactions, forming highly reactive intermediates that could undergo further condensation and polymerization reactions to form colored polymers. These 2 reactions might both contribute to the golden brown color development of pretzel.”

I think the authors are saying that the amylopectin and amylose on the dough surface after dipping in either dip break down to sugars when heated; these sugars can participate in Maillard reactions or polymerize into colored molecules. (I just don’t see the point of the data about the solubility of the molecules into the dip.)

It seems fair to say that there’s a lot going on, and a lye dip could easily produce colors and flavors that can’t be reproduced without it. However, there is no consensus online as to the necessity of lye. The Fresh Loaf has a long, ongoing thread about pretzels in which people posted many photos of good-looking pretzels made with both kinds of dip. (The original post includes a photo showing the importance of the dip versus spritzing water.) [3] There’s also a long thread specific to the lye-versus-baking-soda debate, including the importance (or not) of using food-grade lye. [4] Meanwhile, the folks on Chowhound seem to conclude that baking soda works just fine, although there is some evidence that this occurred simply because Alton Brown’s lawyers wouldn’t let him advocate the use of lye. [5]

What I’d really love to see is a controlled experiment by a baker with the final result (photos and taste-test results) of pretzels dipped in water, baking soda, baked baking soda, and/or lye, at cold and hot temperatures. Has anyone out there done such an experiment?

Update: Here’s a post about speeding up the Maillard reaction with baking soda. It’s got great media of browning onions and a detailed explanation of the reaction. It was shared on Twitter by @E86HotWheels. Martin Lersch. “Speeding up the Maillard reaction.” Khymos. September 26th, 2008. http://blog.khymos.org/2008/09/26/speeding-up-the-maillard-reaction/

Update: Here’s the story for which I was interviewed: Paula Friedrich, “For A Proper Pretzel Crust, Count On Chemistry And Memories,” The Salt, August 9, 2014. http://www.npr.org/blogs/thesalt/2014/08/09/338591194/for-a-proper-pretzel-crust-count-on-chemistry-and-memories


* Lye la Lye, la, Lye la Lye, la-la-la-la Lye!

[1] Yao, Ni, Richard Owusu-Apenten, L. Zhu, and Koushik Seetharaman. “Effect of Alkali Dipping on Dough and Final Product Quality.” Journal of Food Science 71(3), 2006, C209-C215.

[2] McGee, Harold. “For Old-Fashioned Flavor, Bake the Baking Soda.” The Curious Cook, The New York Times. September 14, 2010. http://www.nytimes.com/2010/09/15/dining/15curious.html

[3] http://www.thefreshloaf.com/recipes/pretzels

[4] http://www.thefreshloaf.com/node/4616/food-based-lye-vs-baking-soda-making-authentic-german-pretzels

[5] http://chowhound.chow.com/topics/526455

It Must Be True, I Drempt It

Have you ever discovered that something you’ve believed your whole life is just plain wrong? Like, there is no such word as “drempt” or tool called a “sautering iron”?

What’s worse is when your long-held belief is not only wrong but incredibly foolish. Like that the yolk of the egg turns into the chicken.

egg yolk and chicken

Nope.

I don’t know where this idea came from. Maybe it was my innocent grandmother, who once misunderstood my question of “Where does the sun go when it gets dark?” and explained about the sun going behind the earth, thus leading to my confusion as I tried to spot the sun zooming around to the backside of the earth continuously throughout the day–each time it went behind a cloud. Or maybe it was my not-so-innocent dad, who told me that the high-pitched sounds I heard when he fast-forwarded a cassette tape were tiny people who lived inside the stereo. Their voices were so high, he explained, because their vocal chords were so small.

Somewhere along the line, someone told me that the yolk of the egg solidifies into the chick. I never thought to reconsider.

school passAt last I’ve been set straight. Last week I visited Scroggs Elementary School where one of the kindergarten classes received fertile eggs from Bracken Brae Farm. The class will keep the eggs in an incubator for three weeks until they hatch, then watch the chicks grow for nine days. The chicks will then return to the farm, where the hens will join the egg-laying flock. As I filmed the class, their teacher talked about the changes happening inside the egg. Here’s the real deal:

air pocket in egg

I always wondered about that gap b/n the egg and shell.

The hen produces the yolk, which gets fertilized (or not), encased in the egg white and shell, and laid. If the egg is fertilized, the chick embryo forms along with veins connecting it to the yolk, which nourishes it as it grows. There is a pocket of air at one end of the egg; on its last day inside, the chick pierces the air pocket and starts breathing with its own lungs. Then it pecks its way out. (Here’s a more detailed version with proper nomenclature. [1])

Here’s an animated version of this with some dreamy music. [2] It all makes sense until minute 1:58 when the newborn chick randomly turns into an upright fluffy yellow chick.

And here’s a photographic version with some old-timey orchestra music. [3] (Warning: lots of blood and veins! I only made it through the first half, actually. Then I skipped to the end to see if this newborn chick also morphs instantaneously into a fluffy chick, and it does! Not only that, the one chick then turns into FOUR fluffy chicks.)

So there you have it. Yolk ≠ Chick.

[1] This source and others say that at the end of the process, the yolk sac is drawn into the chick’s body. I can’t figure out how/why. “Stages in chick embryo development,” Mississippi State University. http://msucares.com/poultry/reproductions/poultry_chicks_embryo.html

[2] “Chicken Embryo Development,” Poultry CRC. http://youtu.be/PedajVADLGw

[3] “Development of a chicken embryo,” Vladimir Matveev. http://youtu.be/LKvez9duEHQ

Confined Electrons Get the Blues

Last week, Katie Burke shared her recipe for vibrant spring Violet Jelly at The UnderStory. [1] Apparently, steeping violets produces a blue-green liquid that Katie changed to a more appetizing pink-purple using lemon juice. Katie explains that the color of the anthocyanins (which are pigment molecules) in violets is influenced by pH.

I began to wonder a few things.violet

1. How does the pH change the color?
2. What exactly is pectin?
3. What was the secret of that “oscillating clock” reaction we used to do at the Chemistry Magic Show back in undergrad?

The first question led me through memories of pH indicators to an excellent explanation [2] that I will attempt to summarize as simply as possible here.

1. The color of light is related to the amount of energy in a photon of that light.
2. Molecules can only exist in certain energy states.
3. Therefore, molecules can only absorb light that has photons of a certain size. [3]
4. Different kinds of molecules absorb different-sized photons.
5. If electrons in a molecule are confined, the energy gaps of the molecule spread out; this translates into an ability to absorb larger photons of light.
6. Conversely, if the electrons are able to spread out in a molecule, the energy gaps are smaller and the molecule absorbs smaller photons of light.
7. Larger energy light absorbed = bluer; smaller energy light absorbed = redder.

If this is all totally confusing, imagine an elevator. The different floors of the building are the energy levels of a molecule. The elevator is programmed so it can only stop at a floor, not between them. The elevator gets packets of energy that allow it to climb up. One-sized packet carries it from floor 1 to 2. Another might carry it from 2 to 3 or even from 1 to 3. The size of the energy packets needed matches the spacing between the floors and would change if the building had different spacings… i.e., if it were a different molecule.

The general equation that illustrates pH indicators is this:

HIn ↔ H+ + In-

On the left side is the molecule (In) bonded to H, and on the right side is the molecule with H removed. On the left side, the molecule’s electrons are confined into a bond with that stupid killjoy hydrogen, but on the right side they are happy and free. So what happened with Katie is…

1. Happy free electrons = absorb reddish light.
2. Add acid; reaction shifts to left side.
3. Confined electrons = absorb bluish light.

But wait a minute. Katie’s jelly turned more RED when she added lemon juice. What’s up with that? Because the molecules absorbed bluer light, red was what was leftover to shine out from the depths of her jelly.

To see the actual molecules at work and get more references, visit [2] and scroll down. I’ll tackle my other questions in another post.

[1] “April Showers Bring Jelly Made Out of Flowers,” The UnderStory, by Katie Burke, 2014. http://www.the-understory.com/2014/04/22/april-showers-bring-jelly-made-out-of-flowers/

[2] “Water to Wine. The molecular basis of indicator color changes,” General Chemistry Onlinehttp://antoine.frostburg.edu/chem/senese/101/features/water2wine.shtml

[3] UPDATE: My dad pointed out that photons do not have physical “size.” Using the correct terminology was never my strong point! What I mean is the amount of energy in the photon, and I sloppily use “big” or “large” for “more energy” and “small” for “less energy.” I write it the way I picture it, I guess because I’m trying to help others picture it, but I don’t mean to be inaccurate.